
Wednesday, October 28, 2015

Thursday, October 08, 2015
Thing 1 & Thing 2 My Twins 1st Birthday Party
Hey all you out there in blogging land! It has been so long since I posted to my blog but you will see why from this post. I had two beautiful babies a year ago and we just finished celebrating their first birthday! The following photos are from the party and are mostly inspired by things on Pinterest.
I will post the resources, where I can, to those places so you too can create your own "Thing 1 & Thing 2" party as well!
The first thing I did after figuring out the theme I wanted for my twins was to create an event in Facebook. With this event, I needed to create an event header image. The font I used is called Dr. Soos and you can find it here. This is what I came up with:

Next, I created the actual invitation. This was for posting on the event page and also to print and mail out. I made it so I would be able to put two into a publisher file and print them on a colour printer to be cut. You could also design these and upload them to a place like Heritage Makers and have them printed.
These invitations were inspired by a few different sources but namely from Pinterest which the picture goes to an Etsy account and it is no longer available. I can customize these for anyone and send you a high resolution file for $15 USD. Order custom invitation file here. (I can take the bow off of Thing 2 or put it on Thing 1 as well, depending on your needs.)

I wanted to have this party be super special and custom so I created these sweet profile 12x12 pages for the twins of their favourite things etc. Some people make them at 11x14 but I wanted to be able to put it in their scrapbook when the party was done so I stuck to 12x12. Inspiration and elements for these pages were picked up from Lane + May and you can find her on Facebook as well as Etsy. She creates these little gems but I did these myself as to save some money. Plus with me being "kreative" and all, I wanted to do as many things as I could, myself.


While searching for all things "Thing 1 & Thing 2," I came across a FREE Dr Seuss Cat in the Hat with Thing One and Thing Two party printable kit from Homeketeers.com. The Kit Includes: Party Hats, Cupcake Wrappers, Hershey Kiss Labels, Straw or Treat Flags, Treat Bag Toppers, Water Bottle Labels, Mini Candy Bar Wrappers, Table Tents and Treat Box.
I wanted to use everything and I cut out a lot from here but with having twins you find that you run out of time fast. I only ended up using the water bottle labels and the party hats. I printed them on plain white printer paper and then cut out the hats with scissors and taped them to other party hats that I had hanging around. It was perfect because then I didn't have to worry about the stiffness holding up and to try to put a stretchy string on them. The bottle labels, I cut out with my Silhouette Cameo. 50 labels lickity split!

See the hats in this photo... They didn't want to keep the hats on. Around the girl's hat is the headband that came with the outfits. She didn't want to keep that on either, see next photo!


Speaking of these amazing photos... these were done by my friend at K&E Imaging. It was a Smash Cake photo session. I baked the cakes and iced them with rosettes. The babies seemed to like the cake but we didn't let them eat a lot of it as they would have a smash cake at the actual party. We did these photos 3 days before the party so that I could print them out and frame them for the wall display.

I will bet you want to know where I got the darling outfits? These were purchased on Etsy. (Leg warmers from Birthday Express) There are many people who make a variation of these but I would urge you to find a seller that you trust and are comfortable with. My friend made the little blue boutonniere for my son's outfit and the red flower on top of my daughter's hat (above).

I did a trial on these cupcakes the month before to make sure I would like them. They are yellow cake from the box with added bananas, sour cream, vanilla, etc. You can find the recipe here. I also made a batch of gluten free ones because I knew there would be family and friends there who cannot have gluten. They raved about the cupcakes and said they were the best gluten free cupcakes they had ever tasted. I use the same recipe but got a box of Betty Crocker Gluten Free Golden Cake mix for them. For the icing, I did use the cream cheese icing for the cupcakes but for the actual cake I stuck with butter cream icing because I was afraid that the rosettes would melt down the side of the cake before the twins smashed it.

The cake turned out nice. I continued with the rosettes on the actual party day but instead of making two cakes, one for each baby, I made this one so I could display it on this stand that I got at my local hobby store. I took two cupcakes one with a blue wrapper and one with a red one, sprinkled blue sugar on one and red sugar on the other and then tipped them a bit sideways to make them a bit more whimsical then secured them with rainbow lollipops. (These were also favours that the kids could take home with them along with pencils and stickers.) This was a quick job as I was still icing cake when the party was in session. I put a little too much green in the icing for the cupcakes, I was trying to make it the teal/aqua color of the Thing 1 Thing 2 hair but it didn't quite make the grade! Oh well! All in all, I was pleased with the tower of cake for the amount of time I had to do it in!
Living with twins can put you behind without knowing it will happen! I had the best of intentions of getting everything done and in fact, some of the decorations and ideas never made it to the party. More on that later...

Ready to be smashed!


The aftermath!

I uploaded all the photos from the shoot to COSTCO and they just happened to have a sale on collage posters so I had this gem printed up which I displayed when you came through the door. I had this frame already, there is a lego poster behind it from when my older son was younger. I just placed this over top. The stand is gorgeous, I know. We saw it in a Christmas store as a display and asked the owner if it was for sale. We ended up buying it!

Also as you came through the door, we had a Dr. Seuss birthday book for each twin for people to sign. I had every intention of printing up a little sign that talked about signing the books, but I didn't have enough time. It would have looked something like this.
I printed the invitation out in 8x10 along with some of the photos from the shoot and I used scrapbooking adhesive to just pop them over the glass of the frames I already had on the wall.
The cups, pencils and stickers were left over from my friend's sister's party. She was sweet enough to bring them over to me to see if I wanted to use them too! I have noticed that you can get a lot of Cat in the Hat decorations from Amazon as well but with us living Canada, they did not ship most of those items here. #TheProblemWithLivingInCanada

So, the display wall came together better than I had hoped! The pom poms, balloons, plates (not shown here), baby leg warmers, candles and Cat in the Hat paper down the middle of the wall were all from Birthday Express. The marquee letters by Heidi Swapp were from Michaels and I had them already in the nursery. I also got the chevron paper from Michaels. It comes in a roll and was described as scrapbooking paper for backing in frames. It was perfect for what I was doing. The red frames I painted, the black frames for the black chalkboard stats 12x12 prints are labeled for framing LPs and they also came from Michaels. The inspiration for this display also came from Pinterest and you can find it here.

This is my family at the end of the day, twins all in their pjs and overly ready for bed!

Thing 1 & Thing 2 AKA: Cherub (Bennett) & Angel (Harmony)

Some things didn't make it to the party. I had these wooden letters that I bought a while back and painted them. I was going to use them somehow in the display but they didn't make it up. That's ok, they can still serve the initial purpose of going above the cribs. I may add something to Harmony's like glitter or flowers. We will let that idea marinade for a while!

Another thing that "got left on the cutting room floor" was the birthday banner. I worked hard on this one and I just didn't have time to put it up. Thanks mom for helping me place the paper before I glued everything down!

Mom texted me a day later saying that I could still use that banner for subsequent birthdays. Yes, I may do that! I printed the paper on my printer that I purchased from Lane + May Studio. I bought the dove tail template along with others for later from WendyBird Designs and cut everything out with my Silhouette. I was going to have a photo booth but with the lack of time, I didn't get any props made. It's probably better that it didn't happen as the house was crazy busy with so many wonderful people!
If you would like me to make you a "Happy Birthday" banner, I charge $15 plus $1 for each extra letter, also $5 for shipping anywhere in Canada or the USA. Message me with your requests!

Thank you for coming by and reading my post! My gift to you, if you choose this theme is a digital download of the faceless Thing 1 & Thing Two. I have removed my twins faces of course and in this file you will get a high resolution transparent copy without a bow, with a bow on each, with a bow on the right and one with a bow on the right so if you have a variation of twins and gender of kids, this will work! Click here for download.

Please follow me on Pinterest and be sure to visit my new scrapbooking site and sign up for your FREE preferred customer account which will enable you to receive 30% off of all of your scrapbooking needs!
-Kreative Karma
Saturday, March 30, 2013
Spring Door Hanging
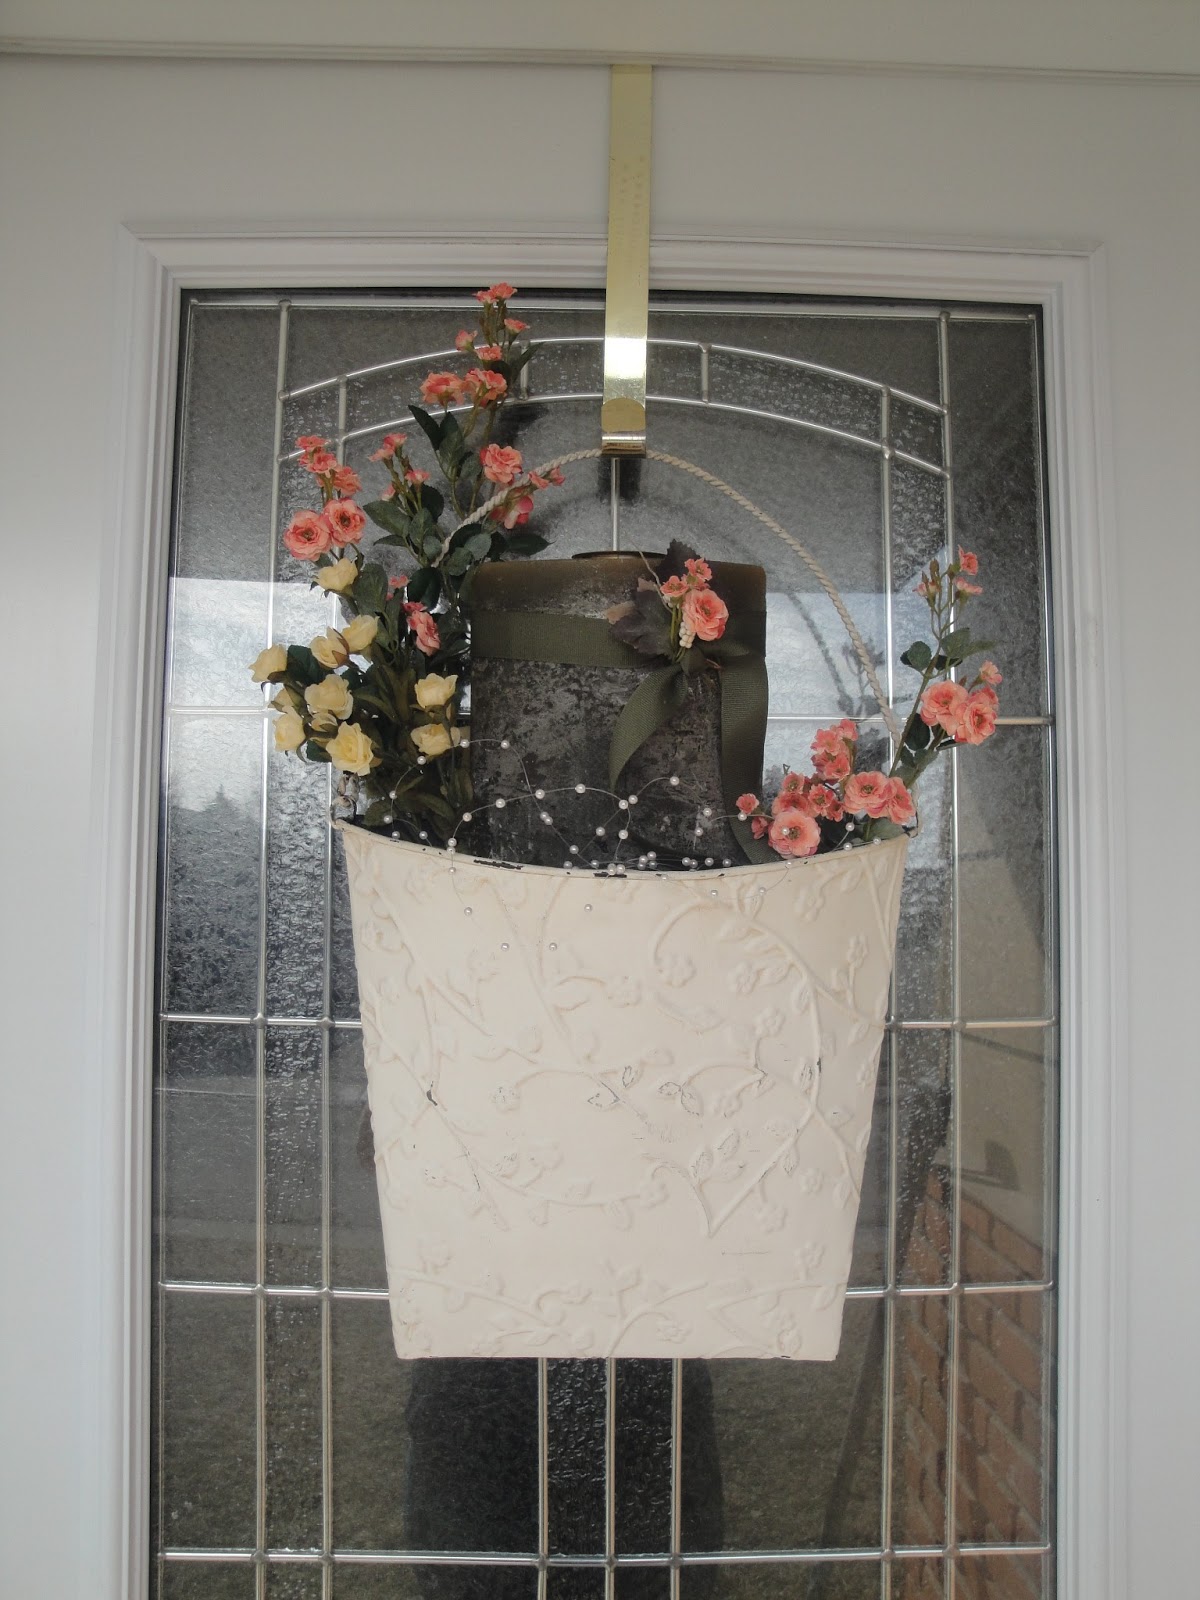
Enjoy,
Karma
Monday, April 16, 2012
National Scrapbooking Day Super Contest
What better way to celebrate National Scrapbooking day then to win some really great prizes? We couldn’t agree more, so thanks to our friends at Homeketeers we are giving away some great prizes in honor of National Scrapbooking day.
One Grand Prize Winner:
- Tim Holtze Vagabond – value $249.99
- 10 scrapbooking Kits – value $220.00
One First Prize Winner:
- Pink Sizzix Sidekick – value $39.99
- 7 scrapbooking kits – value $150.00
Two Second Place Prize Winners:
- 5 scrapbooking kits – value $110.00

Saturday, April 14, 2012
Spring Decorating
In the spring I start getting restless and want to change everything in my home. Well, DH is out of town this week and that is usually when things happen in the house! One year he went away on a trip and came back to no carpet on the bedroom floor. It's cause I pulled it all up and found hardwood under there! He was so impressed that we ended up pulling all the carpet up in the house. We only had to have the hallway resurfaced and fixed. But I digress!


I have done a few things this weekend. Reworking the mantel and created a wall of framed maps.
I had a dark painting of fruit above my mantel for winter/after Christmas and it was just feeling too drab. So I took everything down and off the mantel and decided to do frames and mirrors. I am not done the decorations yet, but this is how the layering of the frames looks:

Interesting... I see the mirror is reflecting the photos I have on the opposite wall in this photo. I have 2 mirrors and 2 frames stacked together. White, silver, platinum and gold. I have my fall mantel posted here if you are curious to see that.
While I was downstairs getting some laundry done, my son found some old toys that he wanted to play with. He wanted to stay down there so I went ahead and started to tackle my scrapbooking room mess. I noticed 5 IKEA frames that I had purchased before Christmas and remembered that I wanted to do a project with them. It was inspired by something I found on Pinterest.

This is my guide for the wall hangings. After I cut out all the States/Provence that I have lived in, I taped this on the wall to see where I wanted to hang the pictures up at.

Here is the result. I did not end up putting them exactly where I put the push pins but they are close. I wanted to have the same amount of spacing between the frames but have them placed in relatively the same space as they were on the map. Sorry I had to take the photo sideways because there is a closet right in front of that wall.
Next project I might like to do is to take all of our license plated from each place and string them together. Inspiration maybe something like another project I found on Pinterest.
Wednesday, August 31, 2011
NEW Publishing Products

5 x 5 Greeting Cards
Square cards are everywhere this holiday season and Heritage Makers has them! Perfect for celebrations of any kind these cards will add an entire new dimension to our card offerings.
4 x 8 and 8 x 4 One-sided Photo Cards
Want to send cards to everyone you know this holiday season. One of our newest cards is a super sleek design and an exceptional value that will cost Club members around 50 cents.
11.5 x 8.5 Tri-fold Brochure
This heavy-duty business offering comes in pack of 20 and makes the perfect Christmas letter, team roster or standing menu.
6 x 9 Booklet
If you like our 8.5 x 11 booklet, you’ll love its smaller cousin the 6 x 9 booklet. The standard 16 pages are just the right size for a program, neighborhood recipe book or child’s art book. The booklet is expandable to 32 pages in four-page increments.
8 x 8 Soft-bound Book
A fabulous and inexpensive book for those kid or school stories, this 21-page, soft-cover book is perfect bound and expandable to 50 pages.
12 x 12 Wrapped Canvas
Possibly the most applauded new product, the 12 x 12 canvas is the perfect size for wall groupings or photos of every family member.
Pearl Paper
Choose pearl paper at check out for an extra dash of style on cards or 12 x 12 scrap pages. With its glittery, pearlescent finish, this upgrade will be a winner for baby announcements, holiday cards and wedding invitations.
Tuesday, June 28, 2011
I need to pin...

So far my "Been There Done That" board is slim pickings...
but I know it will get full this summer!! WOOT!
Friday, June 03, 2011


Friday, May 06, 2011

Monday, April 25, 2011
Peaceful Blog Train - By FaithSisters.com

Cinda of Digital Compilations
Vicky of Today's Scrap
Erika of Steadfast and Immovable
Angel of Designs by Angel
Barbara of Precepts and Promises
Theresa of Forget Me Nots Designs
Kris of Scrap Warrior
Karma of Kreative Karma (You Are Here)
Pam of by the Shore Designs
Faith Sisters Blog
Monday, January 10, 2011
Sesame Snaps, Canadian Goodness!
So when DH and I moved from Canada to the USA 14 years ago, we noticed that they didn't have one of our loved snacks, Sesame Snaps! It is such a simple treat, yet it seems so complex at the same time!
Well, lately we have been having a lot of different seeds and nuts on our salads and yogurt, etc. DH decided he wanted to get some sesame seeds for snacks in his trail mix. It got me to thinking about Sesame Snaps! I thought, man, I should just make my own. How hard could it really be? So I went on a Google search. I found a few different recipes and they were interesting, so I combined a few different aspects of what I found, into my own recipe.

Here it is:
Karma's Sesame Snaps
1 1/3 c. Toasted Sesame Seeds
1 1/2 c. Brown Sugar
1 T. Butter
2 T. Honey
1/4 Fresh Squeezed Lemon
1/4 t. Vanilla
FIRST: Grab a cookie sheet, preferably one with no edges. Butter or spray it with cooking spray. Also butter or spray a rolling pin and have these items ready as you will have to act quickly when everything is done cooking.
If you don't have toasted sesame seeds you can toast your own. I threw mine in a pan and turned it on medium and stirred them for a few minutes. Never leave your seeds on the stove unattended as they WILL burn! You will want to watch them very carefully. Another way you could do it is to put them on a baking pan in the oven at 350°F (180°C) and stir them a few times for 20 minutes. Set these aside.
In a small heavy sauce pan, you will want to combine all ingredients but NOT the sesame seeds. Stir the brown sugar, butter, honey, lemon and vanilla together on a medium heat with a candy thermometer until it gets to 310 degrees or to hard crack stage. It should be an amber color when it is ready.
Take the candy mixture off the heat and quickly stir in the sesame seeds. Coat the seeds thoroughly and then pour the whole mixture onto the cookie sheet. Press everything down and then roll it out on the pan. You should be able to cover most of the pan. Now, grab a pizza cutter or a knife and score it into pieces. If you wait too long, it will be too hard and it will just crack into chunks rather than having a nice smooth edge.
Once this has cooled a bit, but not all the way, remove the pieces from the sheet and place them on a plate to cool the rest of the way. If you wait too long, they could stick to the cookie sheet.
Apparently these will keep for a week in an air tight container, but I don't see why they can't keep for even longer in the fridge or even in the freezer.
DH was so surprised when I made these and our son even ate them and liked them. Now that is a rare thing from such a picky eater!
ENJOY a little chunk of Canadian goodness! :D

Well, lately we have been having a lot of different seeds and nuts on our salads and yogurt, etc. DH decided he wanted to get some sesame seeds for snacks in his trail mix. It got me to thinking about Sesame Snaps! I thought, man, I should just make my own. How hard could it really be? So I went on a Google search. I found a few different recipes and they were interesting, so I combined a few different aspects of what I found, into my own recipe.

Here it is:
Karma's Sesame Snaps
1 1/3 c. Toasted Sesame Seeds
1 1/2 c. Brown Sugar
1 T. Butter
2 T. Honey
1/4 Fresh Squeezed Lemon
1/4 t. Vanilla
FIRST: Grab a cookie sheet, preferably one with no edges. Butter or spray it with cooking spray. Also butter or spray a rolling pin and have these items ready as you will have to act quickly when everything is done cooking.
If you don't have toasted sesame seeds you can toast your own. I threw mine in a pan and turned it on medium and stirred them for a few minutes. Never leave your seeds on the stove unattended as they WILL burn! You will want to watch them very carefully. Another way you could do it is to put them on a baking pan in the oven at 350°F (180°C) and stir them a few times for 20 minutes. Set these aside.
In a small heavy sauce pan, you will want to combine all ingredients but NOT the sesame seeds. Stir the brown sugar, butter, honey, lemon and vanilla together on a medium heat with a candy thermometer until it gets to 310 degrees or to hard crack stage. It should be an amber color when it is ready.
Take the candy mixture off the heat and quickly stir in the sesame seeds. Coat the seeds thoroughly and then pour the whole mixture onto the cookie sheet. Press everything down and then roll it out on the pan. You should be able to cover most of the pan. Now, grab a pizza cutter or a knife and score it into pieces. If you wait too long, it will be too hard and it will just crack into chunks rather than having a nice smooth edge.
Once this has cooled a bit, but not all the way, remove the pieces from the sheet and place them on a plate to cool the rest of the way. If you wait too long, they could stick to the cookie sheet.
Apparently these will keep for a week in an air tight container, but I don't see why they can't keep for even longer in the fridge or even in the freezer.
DH was so surprised when I made these and our son even ate them and liked them. Now that is a rare thing from such a picky eater!
ENJOY a little chunk of Canadian goodness! :D

Friday, November 05, 2010
Your Best Holiday Ever! - Heritage Makers News from Kreative Karma
If you cannot see this newsletter properly, please go to http://thekreativekorner.com/   Holiday Ever! Do you dream of orchestrating the perfect holiday experience? You know the fantasy — the inner smugness of early shopping before the crowds hit, the holiday home décor even Martha Stewart would appreciate, and the entire month of December spent at home with family, blissfully celebrating the true spirit of the season. Yeah, right! Unfortunately, the dream that fires up brightly in October, usually burns down to a few embers in November, and is finally snuffed out completely by early December. Well, at Heritage Makers we say, “Don’t give up on the dream! We can help you make it happen!” “How?” you say. Two words…HOLIDAY HITS! Holiday Hits is a special promotion from Heritage Makers that will help you in two ways. First, it provides early publishing discounts on selected products each week during November. Second, the Holiday Hits web page is loaded with fun ideas for seasonal décor and adorable gift suggestions. Browse the weekly specials and don’t miss the bonus video demos for tips and tricks! If you need more publishing points, be sure to double your discount by taking advantage of our 40% off “Like It!” “Love It!” or “Gotta Have It!” points packages. Just click here to use a special Holiday Hits planner to determine how many points you need. So hold onto your dreams! With help from me, there’s still time to pull off a Christmas miracle. Visit my website and click the "Holiday Hits" image to get all the details. November’s New Studio Art If you haven’t already checked out November’s new art collections, get ready to get excited. Fourteen collections are in this month’s mix, including the eight shown here. “Jack Frost” and “Merry Christmas” were chosen to help round out your holiday memory making. “Jack Frost” is designed in aquas and greens—the hot new colors this winter season, while “Merry Christmas” features traditional holiday colors.    Pictured here, and also sure-to-be hits, are a new pet collection called “Playful Pups” and an all-Basic baby girl collection called “Sweet Little Girl.” Hot tip for the “Playful Pups” collection: use the bones alphabet from last month’s “A Spooktacular Evening” to complement this playful pooch theme.  Not a Premier member yet? No problem. You can get a FULL YEAR of premier for just $99.95 (less than $9 per month). Watch a short video about Premier:  The Joy of "Getting It"  “It’s so much fun when you see people get it!" OK, what are we talking about here? A tax refund? A college diploma? No, we’re talking about the moment people realize that Heritage Makers could be something very wonderful and powerful in their lives. It usually happens during a HM workshop or Studio Demo. In some cases, people “get it” even earlier as they turn the pages of a personalized storybook for the first time. And for some, the moment arrives as they sit in front of their computer and realize they have created something very beautiful, something with real meaning, something that will bring joy to a loved one. If you’ve had a hand in helping someone “get it,” the feeling doesn’t fade quickly. That’s why becoming involved with the Heritage Makers business opportunity is so satisfying. You help people tell their stories, share their values, celebrate the everyday joy of living. Many HM consultants say they would do it for free! Fortunately, Heritage Makers offers rich financial rewards so consultants can do what they love to do, and earn the part-time or full-time money they need.  Frankly, there has never been a better time to get involved in the HM business. We are a young business—just five years old. The potential for growth is incredible. People want to go digital. They want to do something with their photos; they just need your help! We need consultants in every area so these people can “get it!” Frankly, there has never been a better time to get involved in the HM business. We are a young business—just five years old. The potential for growth is incredible. People want to go digital. They want to do something with their photos; they just need your help! We need consultants in every area so these people can “get it!”I invite you to explore the benefits of becoming a personal publishing consultant with Heritage Makers. The holiday season is a wonderful time to start since everyone you know is thinking about his or her Christmas list. The fact is, you could bankroll your entire gift budget by spending just a few nights in the next couple of months introducing people to the fun and creative projects they can make in Studio. Click on the image below to see our consultant starter kits. We offer payment plans that let you split your kit into 2 or 3 payments!  |
| For more information, visit my website at http://www.thekreativekorner.com or email me today! |
Monday, October 25, 2010
Digi Scrap Blessings for You!
Welcome to the Faith Sisters Blog Train!
We have recently added a number of new designers at Faith Sisters and each of us have a gorgeous gift for you! Here is mine...

Make sure you stop by each of our blogs to collect a complete kit!
http://susangodfrey.com/blog/
http://todaysscrapbyvickyday.blogspot.com/
http://scrappingwithangel.blogspot.com/
http://simplegirlscraps.blogspot.com
http://blog.digitalcompilations.com
http://circleoflifescraps.blogspot.com
http://colestoucan.blogspot.com/
http://living4him2.com/blog/
http://www.designzbydede.com
http://preceptsandpromises.blogspot.com/
http://www.oceanwidedesigns.com/2010/10/blessings-faith-sisters-blog-train/
http://majorscrapola.blogspot.com/
http://www.bytheshoredesigns.com
http://forgetmenotsdesign.blogspot.com
http://latzeng.wordpress.com/
http://audraslittlescraps.blogspot.com/
http://www.meredithcardall.com
http://thekreativekarma.blogspot.com (You are here)
http://scrapwarrior.com/blog/
http://steadfast-and-immovable.blogspot.com
Kaboose: http://www.faithsisters.com
We hope to see you at Faith Sisters soon!
We have recently added a number of new designers at Faith Sisters and each of us have a gorgeous gift for you! Here is mine...
LINK EXPIRED - YOU CAN GET THIS KIT AT FAITHSISTERS.COM
Make sure you stop by each of our blogs to collect a complete kit!
http://susangodfrey.com/blog/
http://todaysscrapbyvickyday.blogspot.com/
http://scrappingwithangel.blogspot.com/
http://simplegirlscraps.blogspot.com
http://blog.digitalcompilations.com
http://circleoflifescraps.blogspot.com
http://colestoucan.blogspot.com/
http://living4him2.com/blog/
http://www.designzbydede.com
http://preceptsandpromises.blogspot.com/
http://www.oceanwidedesigns.com/2010/10/blessings-faith-sisters-blog-train/
http://majorscrapola.blogspot.com/
http://www.bytheshoredesigns.com
http://forgetmenotsdesign.blogspot.com
http://latzeng.wordpress.com/
http://audraslittlescraps.blogspot.com/
http://www.meredithcardall.com
http://thekreativekarma.blogspot.com (You are here)
http://scrapwarrior.com/blog/
http://steadfast-and-immovable.blogspot.com
Kaboose: http://www.faithsisters.com
Be sure to check out the designer quick pages now in the shop at Faith Sisters, only $1.00 each.
 |  |
 |  |
 |  |
 |  |
 |  |
 |  |
 |  |
We hope to see you at Faith Sisters soon!
Subscribe to:
Posts (Atom)


